Tech
How to Move Photos on Your Samsung Galaxy to SD Card
If you own a Samsung Galaxy smartphone, you’re likely aware of the limited storage space available on these devices. Thankfully, Samsung has provided a solution in the form of expandable storage through SD cards. In this comprehensive guide, we will walk you through the process of moving your photos from your Samsung Galaxy to your SD card. By the end of this review, you’ll be equipped with all the knowledge and tools necessary to free up valuable space on your device and keep your memories safe.
Benefits of Moving Photos to SD Card
Before we delve into the technical details, let’s take a moment to understand why moving your photos to an SD card is a smart move.
Space Optimization
One of the most significant advantages is the ability to optimize your device’s internal storage. By transferring photos to the SD card, you can free up precious space for apps, videos, and other essential data.
Enhanced Security
SD cards are removable, making them an excellent choice for storing precious memories. They are less vulnerable to data loss in case of device malfunction or loss, as you can easily remove the card and access your photos from another device.
Organizational Benefits
By moving photos to the SD card, you can organize your media more efficiently. This can help you find specific photos faster and keep your device clutter-free.
Checking Available Space on Your SD Card
Before you start transferring your photos, it’s essential to check the available space on your SD card. Here’s how:
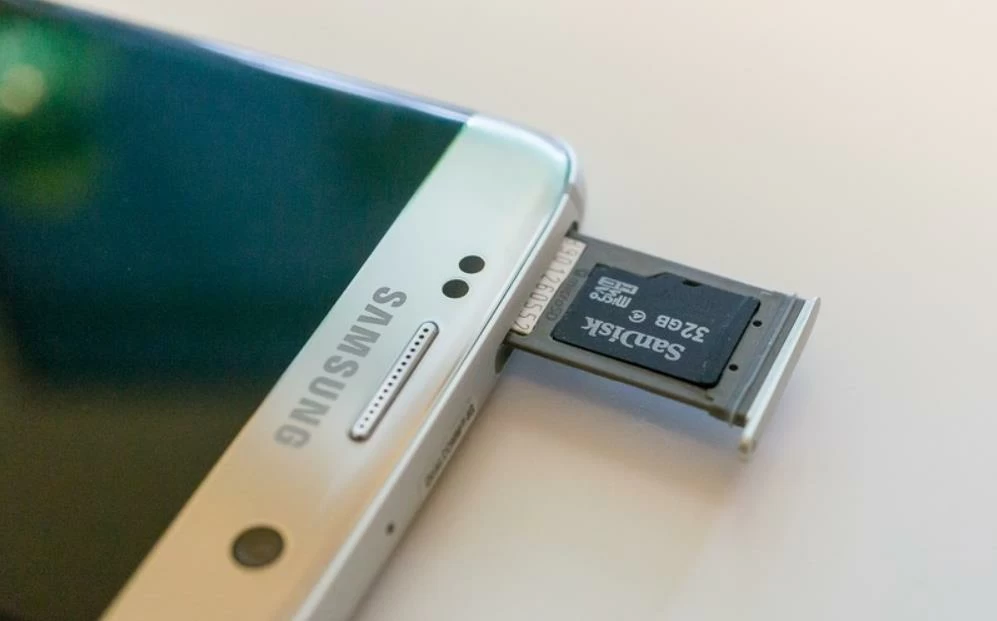
Step 1: Insert your SD card into your Samsung Galaxy device if it’s not already inserted.
Step 2: Open the “Settings” app on your device.
Step 3: Scroll down and tap on “Device care.”
Step 4: Under “Storage” you can see the available space on your SD card. Ensure you have enough space for your photos.
Preparing Your Samsung Galaxy Device

Before you start moving your photos, you need to prepare your device for the transfer. Follow these steps:
Step 1: Ensure your Samsung Galaxy device is charged or connected to a power source. Transferring photos can be a battery-intensive process.
Step 2: Make sure your SD card is properly inserted into your device.
Step 3: Back up any important photos to a cloud service like Google Photos or to your computer. While the transfer process is generally safe, it’s always a good practice to have a backup.
Step 4: Close any open apps and clear any unnecessary files or cache to speed up the transfer process.
Transferring Photos to SD Card
Now that your device is prepared, let’s move on to the actual process of transferring your photos to the SD card.
Step 1: Open the “Gallery” app on your Samsung Galaxy device.
Step 2: Browse through your albums and select the photos you want to move to the SD card. You can select multiple photos by tapping and holding one photo and then tapping others.
Step 3: Once you’ve selected the photos, tap on the three-dot menu icon in the upper-right corner of the screen.
Step 4: Select “Move to SD card” from the menu.
Step 5: A confirmation message will appear. Tap “Move” to start the transfer process.
Step 6: Wait for the transfer to complete. The time it takes depends on the number and size of the photos being moved.
Step 7: Once the transfer is finished, you’ll receive a notification confirming that your photos have been moved to the SD card.
Managing Your Photos on the SD Card
Now that your photos are safely stored on the SD card, it’s a good idea to know how to manage them effectively. Here are some tips:
Organize Your Albums
Use the built-in tools in your Gallery app to create and manage albums. This will help you keep your photos well-organized and easy to find.
Regularly Backup Your SD Card
Just as you did with your device’s internal storage, it’s crucial to back up the photos on your SD card regularly. This can be done using cloud services or by copying the contents of your SD card to your computer.
Delete Unwanted Photos
Periodically go through your photos and delete any that are no longer needed. This will help you maintain a healthy amount of free space on your SD card.
Troubleshooting Common Issues
While the process of moving photos to an SD card is generally straightforward, you might encounter some issues along the way. Here are some common problems and their solutions:
Insufficient Space on SD Card
If you receive a notification that there’s not enough space on your SD card, you can either delete some old photos or upgrade to a larger SD card with more storage capacity.
Photos Not Showing on SD Card
If you can’t find your photos on the SD card after the transfer, make sure you check the “SD card” section in your Gallery app. Sometimes, photos may still appear in the internal storage section.
Slow Transfer Speed
If the transfer process is taking longer than expected, ensure your SD card is not corrupted or too slow. Consider using a high-speed SD card for better performance.
Can i transfer data from one SD card to another
SD cards, or Secure Digital cards, have become ubiquitous for storing and transferring data in various electronic devices, such as cameras, smartphones, tablets, and more. Whether you’re upgrading to a larger capacity card, need to back up your important files, or simply want to share data between devices, the question often arises: Can I transfer data from one SD card to another? The answer is a resounding yes. In this article, we will explore various methods and tools you can use to efficiently transfer data from one SD card to another.
Using a Computer
One of the most common and straightforward methods for transferring data between SD cards is by using a computer. This method is ideal for those who have a card reader built into their laptop or desktop computer. Here’s how you can do it:
Insert the SD Cards: Begin by inserting both the source (the SD card you want to copy from) and the destination (the SD card you want to copy to) into the respective slots on your computer’s card reader.
Open File Explorer (Windows) or Finder (macOS): Navigate to the file management software on your computer. On Windows, this is typically File Explorer, and on macOS, it’s Finder.
Select the Source SD Card: In File Explorer or Finder, locate the source SD card, which should appear as a removable drive. Open it to reveal the files and folders stored on the card.
Copy and Paste: Select the files and folders you want to transfer, right-click, and choose “Copy” (or use the keyboard shortcut Ctrl+C on Windows or Command+C on macOS). Then, navigate to the destination SD card and paste the files and folders by right-clicking and choosing “Paste” (or using the keyboard shortcut Ctrl+V on Windows or Command+V on macOS).
Wait for Transfer: The time it takes to transfer the data depends on the size and number of files being copied. Once the transfer is complete, safely eject both SD cards from your computer.
Using SD Card Backup Devices
If you need to transfer data from one SD card to another regularly or in larger quantities, investing in an SD card backup device can be a convenient option. These devices are designed specifically for copying data from one card to another without the need for a computer. Here’s how they work.
Connect the SD Cards: Insert both the source and destination SD cards into the corresponding slots on the backup device.
Select Copy Option: Many backup devices have a user-friendly interface with options for copying, deleting, or formatting SD cards. Select the copy option and specify the source and destination cards.
Initiate the Copy Process: Start the copying process as per the device’s instructions. Most devices have a button or menu option to begin the transfer.
Monitor Progress: Keep an eye on the device’s screen to monitor the progress of the data transfer. Once it’s complete, you can safely remove the destination SD card.
Using SD Card Cloning Software
For more advanced users or scenarios where you want to create an exact copy of one SD card on another, you can use SD card cloning software. This method is particularly useful when you want to duplicate the entire contents of a card, including the operating system and bootable data. Here’s how you can do it.
Download and Install Cloning Software: Search for and download a reputable SD card cloning software. Examples include Win32 Disk Imager, Rufus, or SD Card Formatter which includes cloning capabilities.
Insert the SD Cards: Insert both the source and destination SD cards into your computer using a card reader.
Open the Cloning Software: Launch the cloning software you installed earlier.
Select Source and Destination: In the cloning software, specify the source SD card (the one you want to copy from) and the destination SD card (the one you want to copy to).
Initiate Cloning: Follow the software’s instructions to initiate the cloning process. This process may take some time, depending on the size of the SD cards.
Verify the Copy: Once the cloning process is complete, verify that the data on the destination SD card matches that of the source. This ensures a successful copy.
Safely Eject SD Cards: After verifying the data, safely eject both SD cards from your computer.
Conclusion
In conclusion, moving photos to your Samsung Galaxy’s SD card is a practical and efficient way to optimize your device’s storage, enhance data security, and keep your media well-organized. With the easy-to-follow steps provided in this guide, you can effortlessly transfer your photos and enjoy the benefits of expanded storage capacity.
By taking the time to manage your photos on the SD card effectively, you can ensure a seamless experience and never have to worry about running out of space on your device. So, go ahead, start organizing your memories, and make the most out of your Samsung Galaxy smartphone.
Make sure to hyperlink the text “Click here” to the relevant page on your website that focuses on Samsung Galaxy repairs with the keyword Screen Fixed Samsung Galaxy repairs. This will help direct readers to the specific page you want to promote.

Top 5 Benefits of Hiring Reliable House Cleaners in Melbourne

How to Remove Personal Data from Data Brokers

Bridging the Gap: Challenges and Solutions for Multilingual Events in KenyaBridging the Gap: Challenges and Solutions for Multilingual Events in Kenya

How to Choose the #1 Ranked Phone Data Service Platform

Affordable Virtual Assistant

Effective WordPress Maintenance and Brand Revamping: Key Strategies for Success

iPhone 15 Pro Max Price in Pakistan: A Comprehensive Review

Exotic Escapes: Unveiling the Most Exclusive Villas in North Goa

Earn Profits with Ellyx P2P Cryptocurrency Exchange

Top Small Business Bank Accounts in the UK: Find Your Perfect Fit Today
-

 Blog1 year ago
MyCSULB: Login to CSULB Student and Employee Portal – MyCSULB 2023
-

 Android App3 years ago
Cqatest App What is It
-

 Android1 year ago
What Is content://com.android.browser.home/ All About in 2023? Set Up content com android browser home
-

 Software2 years ago
A Guide For Better Cybersecurity & Data Protection For Your Devices
-
Latest News2 years ago
Soap2day Similar Sites And Alternatives To Watch Free Movies
-
Android2 years ago
What is OMACP And How To Remove It? Easy Guide OMACP 2022
-
Android3 years ago
What is org.codeaurora.snapcam?
-
Business2 years ago
Know Your Business (KYB) Process – Critical Component For Partnerships